De Realtà Mapei n.° 37 - 10/19/2023

Exterior installations continue to grow in popularity in the ceramic tile industry. This can be for multiple reasons, including a cleaner and more contemporary look, better mortars and grouts, and lower-absorption large-format and gauged porcelain tiles (GPT). Today’s large-format and gauged porcelain tiles today really lend themselves to be an exterior-cladding material competing with many other exterior claddings, because this installation offers a flatter appearance and a large variety of sizes and colors, as well as ease of maintenance and cleanability. However, a lot of critical decisions and planning are required when considering an installation of tile on an exterior substrate. These are obviously not the same as interior projects; they must be protected from weather until completed and cured. This can be a difficult task.
When an exterior installation includes low-absorption porcelain (less than 5 percent) over a waterproof membrane with today’s polymer-/latex-rich mortars that are not protected from the environment, the installation has the potential to experience latex leaching (migration).
The National Tile Contractors Association (NTCA) Reference Manual defines latex leaching as latex migration. Their definition for latex migration is: “White, rubbery substance coming through the joints. Similar in appearance to efflorescence. Unlike powdery efflorescence, latex residue will be rubbery.” To me, latex leaching looks like diluted or watered-down caulking or paint. This additive to cement-based adhesives and grouts comes in several forms. They are generally referred to as polymer or latex, and they come in a liquid form that can be added to unmodified mortars or grouts. They can also come in the form of powder, dry-mixed with the other ingredients in single-component cementitious mortars and grouts. The most common types are ethylene vinyl acetate (EVA), also known as polyethylene vinyl acetate (PEVA) and styrene-butadiene rubber (SBR) known as latex. This additive is common in today’s cement-based mortars and grout because, if formulated correctly, they can improve the mortars and grouts increasing flexibility, water resistance, sheer strength and compressive strength. For cement-based mortars and grouts to gain these potential benefits, the latex must be allowed to dry with the cure of the cement.
If I took a 1-gallon, high-quality latex admixture and left the lid off it, eventually all the water would evaporate away, leaving a rubbery substance in the bottom of the 1-gallon container. If the lid remained on, the latex would stay in the solution, and you will never get the rubbery substance. The same is true when latex is added to our mortars or grouts. To reap the benefits of increased flexibility, water resistance, sheer strength and compressive strength, we need for the latex to dry out. If it stays in solution because it is submerged too early in a pool or water feature or used in an ANSI A118.15 HET mortar where snow or rainwater is pouring on the wall of a large-format or gauged porcelain tile panel installation because the metal parapet cap was not installed for weeks or months after the tile was completed, the odds are good that the installation will experience latex leaching. Today, porcelain tile is very common. It is frequently used on exterior installations due to most porcelain being denser, less porous, and a harder tile that offers greater resistance against stains and water than ceramic tile. Always verify with the tile manufacturer that the tile you selected is suitable for exterior installation. Porcelain tiles are typically suitable because of their low absorption rate that is less than 0.5 percent. The tiles are heated at extreme temperatures, resulting in an extremely rigid, durable and stain-resistant tile that is impenetrable to moisture. When installed correctly, they can be used in the harshest of climates and can withstand cold, rain and extreme weather conditions.
Modern tiles are larger, with dust-pressed tiles as large as 4 feet x 4 feet (1.22 x 1.22 m) and gauged porcelain tile panels larger than 6 feet x 10 feet (1.83 x 3.05 m). Today, the International Building Code (IBC) states in Chapter 14, Paragraph 1404.10.2: “Exterior adhered masonry veneers-porcelain tile. Adhered units weighing more than 3.5 pounds per square foot shall not exceed 48 inches in any face dimension not more than 9 square feet in total face area. Adhered units weighing less than or equal to 3.5 pounds per square foot shall not exceed 72 inches in any face dimension not more than 17.5 square feet in total face area. Porcelain tile shall be adhered to an approved backing system.” This was a change in the building code. According to previous versions of the code from 2009 to 2020, tile size should not exceed 24 inches (61 cm) in any face dimension nor more than 3 square feet (0.28 m2) in total face area. The code change in 2021 allowed tile up to 7 times larger. This was a real win for the tile industry that passed because of lower absorption tiles in addition to better substrates, mortars and grouts.
The best tile mortars for exteriors combine bond strength with flexibility to allow for movement in the substrate caused by fluctuating changes in moisture and temperature levels. Today’s improved thin-set mortars are superior to mortar standards in the past. For example, today’s ANSI A118.15 Improved Modified High-performance mortars are not only subjected to freeze/thaw cycling, as an additional testing requirement found only in ANSI A118.15, they are also subjected to heat aging. The heat aging test uses two 2-by-2-inch (5-by 5-cm) tiles bonded face to face with an ANSI A118.15 Improved Modified High-performance mortar with an 1/8-inch (3-mm) offset. These samples are cured at lab temperatures for 14 days and then placed in an oven at 158°F (70°C) for 14 days. The samples are then put into the shear jig and sheared apart. In the case of porcelain tile, the minimum shear strength is 400 psi (2.76 MPa). This is an excellent example of a lab test for these high-performance thin-set mortars that are expected to perform best in the exterior environment.
When installing mortars that are approved for exterior use, always consult with the mortar manufacturer, but I believe depending on your installation area’s temperature swings, most will recommend an ANSI A118.15 Improved Modified High-performance mortar. For large-format tile and GPT panels, most use a large-and-heavy-tile (LHT) mortar because of the ability for that mortar to go thicker, up to 1/2 inch (12 mm). For the exterior installation of GPT, the ANSI A108.20 installation standard requires application of thin-set mortar on both the substrate and the tile. Poor substrate preparation for large-format tile can also have thicker applications of thin-set mortar.
There are many other things to consider when installing exterior tiles, with one of the most critical being surface preparation to bring the substrate within tolerance. For tiles larger than 15 inches (38 cm) on one edge, the industry requirement for the substrate tolerance is 1/8 inch in 10 feet (3 mm in 3.05 m) and 1/16 inch in 2 feet (1.5 mm in 0.61 m) from the required plane when measured from the high points in the surface.
You must reach out to your setting material manufacturer to find a suitable render or repair material for exterior walls. It should have the ability to float out minor imperfections, including bird baths or big bows in the framing or substrate. Thin-set mortar should not be used for truing of substrates. If you are using an exterior mortar bed on the walls, whether bonded or metal lath and building paper, with properly placed casing beads and expansion joints you should be able to screed the base flat enough to bring the walls within tolerance.
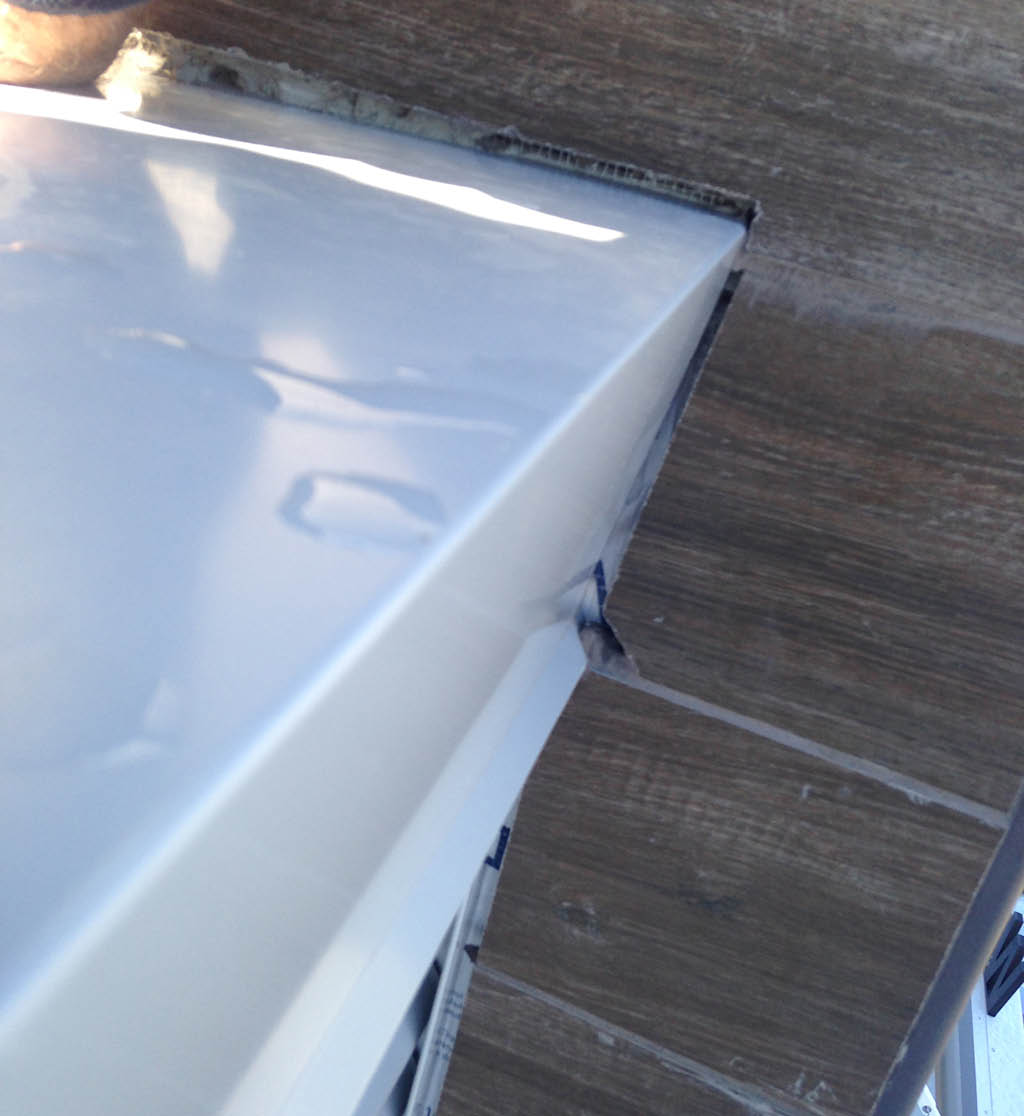
Once the walls are flat, it is important to understand how you will manage water. In the case of a mortar bed or stucco base coat on walls, it may not require additional waterproofing, but you may choose to add it for additional protection. When the installation will include building paper, an air barrier or waterproofing, it is critical that you understand the necessary flashing and how you properly tie into it. Ideally the flashing is already installed: Head flashing in windows and doors, kickout flashing where one roof may meet another wall, and flashing around all openings. With framed construction that involves cement board (CBU), it is common to apply a waterproof membrane over the top of the cement board after it has been installed and properly taped. It is critical that sealants be installed as soon as possible, to keep water pouring off a flashing and into the wall. I have witnessed this on a commercial fast-food restaurant: Water poured into the wall because the sealant was not installed for weeks where the tile terminates at the flashing.
In especially demanding environments, cement grouts are factory-blended or mixed with polymer additives to create better stain resistance and color brilliance with higher bond and compressive strengths. Polymer-modified cement grouts are more resistant to freeze/thaw damage, lower any water penetration, and can also increase grout flexibility, providing increased crack resistance. Products complying with ANSI A118.7 (High-Performance Cement Grouts for Tile Installations) are ideal for exterior applications. They have a lower absorption than ANSI A118.6 grouts. High-performance cement grouts are generally available in a wide variety of colors and frequently have color-coordinated sealants for movement joints. If the grout joint is left exposed to the weather, latex leaching will usually come out through the grout joint with the water as it evaporates to the exterior.
Due to installations of gauged porcelain tile panels larger than 5 x 10 feet (1.52 x 3.05 m), it is not uncommon to see all the grout joints filled with sealant on exterior installations, to follow the movement joint requirements. When a GPT installation is left exposed to weather and then sealant is installed in all the grout joints before the installation is given time to dry out, there will be latex leaching.
All tile installations require movement joints but, due to increased moisture and temperature swings, it is critical that they are installed on exterior projects. Consult TCNA Method EJ171 and ANSI A108.01 for the proper selection of sealant and the frequency of the movement joint placement. On exterior installations, the frequency is increased to 8 feet up to 12 feet in each direction. More frequent joint placement may be required depending on materials and environmental conditions. For movement joints to work effectively, movement joint cavities must be open and free of grout, mortar and setting materials. Install movement joints per ASTM C1193 Standard Guide for Use of Joint Sealants. Tile edges to which the sealant will bond must be clean and dry. For proper use, always consult the sealant manufacturer’s specifications.
Protecting an installation from weather is critical not just during installation but also while it is curing. This usually requires tenting. After the tile is installed, it should be protected from weather. If an open tile installation gets a good rain before grout is installed, it can take on a lot of water; then installers show up the next day, grout the wall and are surprised when the grout has efflorescence or latex leaching down the tile. Latex migration can also occur due to bad sequencing of work: For example, the tile is installed but the roofer doesn’t install the metal cap on the parapet till weeks later. The framed cement board has topical waterproofing, a thick bedding of thin-set mortar, and a low-absorption porcelain tile is installed. It rains a couple of days, and the wall takes on a lot of water. The metal cap is installed on the roof weeks later, and all the water in the assembly only has one path out, through the grout. This can also occur due to a poor installation or lack of flashing, lack of sealants, etc. For these reasons, carefully review all potential areas where water may enter the installation before beginning the installation. Protect the installation before, during and while the assembly is curing. It should also be noted that high humidity and cooler temperatures can also increase cure times.
Submerged installations must be allowed to cure. The curing time required by the setting material, grout and sealants should be discussed with the setting material supplier. The Tile Council of North America Handbook (TCNA) states: “When latex/polymer modified Portland cement mortar is used to install ceramic, glass, and natural stone tiles in an area that may not thoroughly dry out in use (e.g., swimming pools and gang showers, etc.) or where initial drying is inhibited (between tile and impervious substrates), it is recommended that the completed installation be allowed to dry out thoroughly before exposure to water. This drying period can range from 14 to more than 60 days depending upon the temperature and humidity and other climatic conditions, and whether the installation is interior or exterior. Consult setting material manufacturer for minimum set times before grouting tile or allowing traffic, water exposure, or submersion.”
When installing 8-by-8-inch (20-by-20-cm) or larger impervious tile over a waterproof membrane, crack-isolation membrane or other impervious substrate, longer curing times may be required. Curing times may also be extended with narrow grout joints and when High-performance grouts such as those meeting ANSI A118.3, A118.5 and A118.7 are used. When one or more of these conditions exists, delaying grouting will allow better evaporation of excess moisture.
When longer cure times are required on floors, extend the amount of time before allowing traffic on the floor. A rapid-setting latex-/polymer-modified cement mortar may need to be specified for faster curing. Consult the manufacturer for recommendations and requirements. Because polymers vary considerably, the directions of the latex/polymer mortar manufacturer must be followed explicitly.
Latex leaching is not new; it has been an issue for many years. We are seeing an increase today due to waterproof membranes on the substrate, highly modified mortars, low absorption and larger porcelain tiles, as well as poorly coordinated construction details.
Latex leaching can be avoided. If you are planning an exterior installation, it is important that you consider protection of the installation. Make sure you are selecting quality mortars like those meeting ANSI A118.15 and verify your coverage by removing tile on occasion. Before grouting, be sure that the installation is kept dry, and that rain is not expected later in the day. During installation and at a minimum for at least 3 days after completion, protect the completed installation from rain and freezing conditions. Keep excessive water out of the installation by verifying that sealants are installed, flashing is done properly, and roofing or metal caps are directing water away from the wall installation. Take the time to discuss your installation needs with other trades like roofers or sealant contractors. If you keep these points in mind and you select quality tile, waterproofing, mortars, grouts and sealants that work together as a complete system, you should have a beautiful exterior installation with great durability.
About the author
Jim Whitfield FCSI, LEED AP is the Director of Technical Services at MAPEI. He is actively involved in the tile industry standards committees (TCNA Handbook, ANSI A108 committee), is an NTCA Ambassador and proud member of the Technical Committee and is currently the President of the Materials & Methods Standards Association (MMSA).
Subscribe to our newsletter to get Mapei news


